Tuesday, October 9, 2012

White Chicken Chili


This is a wonderfully different spin on chili, and a favorite at our house, especially on a chilly Saturday afternoon while watching football.  Serve each bowl with salsa, sour cream, crushed tortilla chips, and/or additional shredded cheese.


INGREDIENTS 
  • 1 Tablespoon olive oil
  • 2 medium onions, chopped (OR 3 Tablespoons minced, dried onion)
  • 2 cloves garlic, minced
  • 1 (8 ounce) can chopped green chiles
  • 1 jalapeno pepper, diced (optional)*
  • 1/8 teaspoon cayenne pepper (optional)*
  • 2 teaspoons cumin
  • 1 ½ teaspoons oregano
  • ½ t. salt
  • 5 cups chicken broth
  • 3 (15 ounce) cans Great Northern beans, undrained
  • 2 pounds chicken breast, cooked and diced
  • 1 cup shredded cheese, cheddar or Monterey Jack flavor (optional)

DIRECTIONS

  1. In large soup pot, heat oil over medium heat.  Add fresh onions (if using) and garlic; sauté three minutes.
  2. Stir in green chiles, jalapeno and cayenne pepper (if using), and cumin, oregano, salt, and dried onions (if using); sauté another two minutes. 
  3. Mix in broth and beans.  Bring to boil; reduce heat to low.  Simmer, covered, stirring occasionally, for 45 minutes.
  4. Stir in diced, cooked chicken; heat through (about five minutes).  Turn off burner and remove pot from heat.  Slowly sprinkle cheese (if using) into soup and stir until melted, or add cheese (and other mix-ins) to individual bowls after serving.
TIPS

*Adjust heat to your family’s preference.  I completely omit jalapeno and cayenne pepper for our sensitive tastes.

** Simmer chicken breasts on the stove in a pot of water for a couple hours (until tender). Use a fork or fingers to shred/break into pieces the chicken, separating from fat as you go (no need to trim chicken before cooking). Refrigerate or freeze prepared chicken until ready to use (thawing first, if necessary).

ALLERGY INFO

This recipe is free of eggs, peanuts, tree nuts, fish, and shellfish.  To make it dairy-, wheat-, soy-, and/or gluten-free, carefully choose a broth with safe ingredients (many brands aren’t allergen-free; contact me if you need product suggestions as there are options out there).  Omit add-ins or use safe alternatives.  Beans are naturally gluten-free, but canned ones can sometimes contain other non-GF ingredients (look for cans that list only beans, water, and salt as ingredients).  Always double-check ingredients, including cross-contamination risk based on your level of sensitivity and comfort.

Monday, October 1, 2012

CHILI, two different ways


For October I’m sharing with you two different chili recipes to enjoy during cooler weather.  Dressing up for Trick-or-Treat was always one of my favorite events of the fall.  My mother’s tradition was to feed us a warm, hearty bowl of soup or chili before we headed out for candy.  It was quick to eat so we had time to get into our costumes, and filling so we’d have sustenance to last the trek around the neighborhood.  In both these recipes, for the fresh, chopped onion, you may substitute one (1) tablespoon dried, minced onion, added at the same time as the other dried herbs/spices.


Black Bean Chili

This is a meatless version of my grandmother’s chili recipe, modified by my mother.  To make it truly vegetarian, use vegetable broth instead of chicken stock.  Serve with grated cheddar or Monterey jack cheese, sour cream, and crackers (choosing allergen-free versions, if necessary).


INGREDIENTS

  • 2 tablespoons vegetable oil
  • 1 teaspoon minced garlic (about 1 or 2 fresh cloves)
  • 1 green pepper, diced (OR ½ bag of frozen, chopped green peppers, thawed)
  • 1 medium onion, finely chopped
  • 3 celery stalks, chopped
  • 1 (28 oz.) can diced tomatoes, undrained (OR 3 cups fresh tomatoes, roughly chopped, with their juice*)
  • 3 (15 oz.) cans black beans, undrained
  • ½ cup chicken or vegetable broth
  • 1 tablespoon chili powder
  • ½ teaspoon sugar
  • ¼ teaspoon black pepper (or to taste**)
  • ½ t. salt, optional***


DIRECTIONS

  1. Heat oil in a soup pot over medium heat.
  2. Add garlic, green pepper, onion, and celery; sauté until veggies are soft but not yet brown.
  3. Add remaining ingredients; stir to combine.
  4. Bring to boil; reduce heat and simmer, covered, for at least one hour, stirring occasionally.


TIPS

*To easily chop fresh tomatoes, reserving their juice, first remove stem and core.  Then add them whole to a large liquid measuring cup; use kitchen shears held straight up and down to roughly chop them. Bonus: the amount needed can be seen right on the measuring cup as you chop!
**Reduce the amount of pepper if you are sensitive to spicy foods.  Feel free to add more pepper during cooking, or add a few drops of hot sauce to individual bowls, if you like your chili spicier.
***I omit the additional salt from this recipe when I make it. As most canned tomatoes, black beans, and broth already contain salt, adding more to the chili can be too much.  I suggest tasting the chili after it simmers for 30 minutes, then add salt if you find it lacking.


ALLERGY INFO

This recipe is free of eggs, peanuts, tree nuts, fish, and shellfish.  To make it dairy-, wheat-, soy-, and/or gluten-free, carefully choose a broth with safe ingredients (many brands aren’t allergen-free; contact me if you need product suggestions as there are options out there).  Beans are naturally gluten-free, but canned ones can sometimes contain other non-GF ingredients (look for cans that list only beans, water, and salt as ingredients).  Always double-check ingredients, including cross-contamination risk based on your level of sensitivity and comfort.
 

Classic Chili

This traditional recipe is a family favorite.  Top each bowl with grated cheddar cheese, a dollop of sour cream, and crushed crackers (choosing allergen-free versions, if necessary).  For a delicious variation, and to help spread it out over several meals, serve the chili over rice or pasta.


INGREDIENTS

  • 2 pounds ground beef or turkey
  • 1 medium onion, finely chopped
  • 2 tablespoons chili powder
  • 2 teaspoons cumin
  • 1 teaspoon garlic powder
  • 1 teaspoon salt
  • ½ teaspoon oregano
  • ½ teaspoon sugar
  • ¼ teaspoon black pepper (or to taste)*
  • 1/8 teaspoon cayenne pepper, optional*
  • 1 (15 oz.) can tomato sauce**
  • 2 cups water**
  • 3 (15 oz.) cans red or kidney beans, drained and rinsed***

DIRECTIONS

  1. In soup pot, brown meat with onion over medium heat; drain and discard grease.
  2. Add spices/herbs and stir with meat for one minute.
  3. Add remaining ingredients; stir to combine.
  4. Bring to boil; reduce heat to low.
  5. Cook, covered, for 1 to 1.5 hours, stirring every 15 minutes.

TIPS

* Omit the cayenne pepper and reduce the black pepper to 1/8 teaspoon if you are sensitive to spicy foods.  If you like your chili spicier, feel free to add more pepper during cooking, or add a few drops of hot sauce to individual bowls.
** You can substitute one quart tomato juice for the tomato sauce and water.
***Pour beans into wire strainer over sink, and rinse by running water over them until bubbles disappear.  You can substitute one can of beans in chili gravy (un-rinsed) for one of the cans of red/kidney beans.

ALLERGY INFO

This recipe is free of dairy, eggs, peanuts, tree nuts, soy, fish, and shellfish.  It can be made wheat- and gluten-free by using safe beans (look for ones that just have beans, water, and salt as ingredients), and avoiding the option of substituting chili beans (as these usually contain wheat flour).  Use gluten-free pasta if choosing that variation.  Always double-check ingredients, including cross-contamination risk based on your level of sensitivity and comfort.

Sunday, September 9, 2012

Apples and Pie!


Autumn is my favorite season, and, although it's technically still Summer, this cooler weather and picking apples say Fall is here already.  Nothing celebrates this time of year better than an all-American apple pie made through family traditions.  Each year we find a perfect Fall day to go apple-picking at a local fruit farm.  The children enjoy sampling from each tree as they hunt for the perfect apple and load the bags to near overflowing.  My favorite variety of apple is Fuji, but we also pick Jonathan and Golden Delicious, and their hybrid, Jonagold.  We try to ration our supply until the end of November so that we have enough apples for our annual pie-baking event.  The day before Thanksgiving is permanently reserved for this tradition.  The kids and I gather at my parents’ house with my siblings, their spouses, and all my nieces and nephews.  My mom makes the pie dough from scratch while my dad peels the apples.  The kids help mix the ingredients and make sure the filling tastes just right, and sometimes even bake their own “mini pies.”  As the house is filled with the delicious aroma of apples and spices, the most difficult part is knowing we have to wait until the next day to enjoy our creations!


Apple Pie
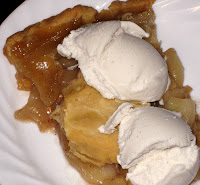
This is a simple, reliable recipe for a classic apple pie.  You may use a traditional crust on top or choose the crumb topping (see recipe below).  For a quick version, use already-prepared pie dough.  Serve warm, cold, or at room temperature, or even à la mode. 
INGREDIENTS
  • Pie dough, enough for 1 or 2 crusts (either homemade, from a mix, or store-bought)*
  • 6 ½ - 7 cups apples, peeled, cored, and thinly sliced** (one apple = approximately one cup)
  • ¾ - 1 cup granulated sugar (choose the larger amount if using a tart apple)
  • 3 tablespoons all-purpose flour
  • ¾ teaspoon ground cinnamon***
  • ¼ teaspoon ground nutmeg***
DIRECTIONS
  1. Preheat oven to 375°F.
  2. Thaw pie dough if frozen.  Roll out dough and line the bottom of a 9-inch pie pan with one crust. 
  3. In a large mixing bowl, combine the apples, sugar, flour, and spices. Mix gently until apples are coated and mixture appears moist.
  4. Pour apple mixture into dough-lined pie pan, filling evenly. If using crumb topping, spread it evenly over the top.  If using a rolled-out dough, place it gently over apple mixture, then seal edges to bottom crust and cut slits in top. 
  5. Trim off any overhanging dough and finish edges as desired.  Cover perimeter of pie with aluminum foil. 
  6. Bake for 30 minutes, remove foil, and bake for an additional 20-25 minutes or until top is golden.  Let cool slightly before cutting.
TIPS
*I prefer to buy pie dough from the store.  I use the refrigerated, unroll-and-fill kind.  So easy and tastes just as good as homemade!  
**The jury is still out on which variety of apple is best for a pie.  Some bakers even prefer a kind that others say never to use!  I grab whatever apples I have on hand, usually combining two different varieties, a sweet with a more tart.  My husband swears by Jonathan apples for his pie.  So, it’s really up to you!
***You may use 1 teaspoon of apple pie spice in place of the cinnamon and nutmeg.
ALLERGY INFO
This recipe is free of eggs, peanuts, tree nuts, fish, and shellfish.  To make it dairy- and/or soy-free, carefully choose or make a pie dough with safe ingredients.  To make it wheat- or gluten-free, use rice flour or tapioca flour instead of the all-purpose flour, and choose a gluten-free pie dough mix or pre-prepared crust.  Always double-check ingredients, including cross-contamination risk based on your level of sensitivity and comfort.


Crumb Topping
This topping can be used in any fruit pie recipe (apple, cherry, peach, rhubarb, berry, etc.).  Add ¼ cup rolled oats (certified gluten-free, if needed) and ¼ teaspoon nutmeg or cinnamon with the dry ingredients to use it as the topping for a fruit crisp.


INGREDIENTS
  • ½ cup brown sugar
  • ½ cup all-purpose flour
  • ¼ cup cold butter or margarine*
DIRECTIONS
  1. Mix brown sugar and flour together in large bowl.
  2. Cut in butter or margarine using a pastry blender until mixture resembles coarse crumbs.
  3. Sprinkle and spread evenly on dessert before baking.
TIPS
* The amount of butter/margarine can be decreased to 3 Tablespoons, if desired, but I find it harder to work in; it takes longer to get to that “course crumb” stage, but it is slightly healthier.
ALLERGY INFO
This recipe is free of eggs, peanuts, tree nuts, fish, and shellfish.  It can be made dairy- and/or soy-free by using a safe margarine, carefully choosing one made specifically for baking.  It can be made wheat- or gluten-free by using a gluten-free flour mix in place of the all-purpose flour.  Always double-check ingredients, including cross-contamination risk based on your level of sensitivity and comfort.

Wednesday, July 18, 2012

Chicken Cacciatore


Chicken Cacciatore

Chicken cacciatore is a great summer meal in which to use those fresh tomatoes, bell peppers, onions, garlic, and oregano from the garden or farmer’s market.  Save this recipe to use in the winter as well, by substituting canned, frozen, and dried ingredients instead.

INGREDIENTS

  • 2 tablespoons vegetable oil
  • 1 teaspoon minced garlic (about 1 or 2 fresh cloves)
  • 2 bell peppers, thinly sliced (1 green and 1 red, orange, or yellow), OR 1 bag frozen onion/pepper blend, thawed
  • 1 medium onion, sliced (omit if using bag of onion/pepper blend)
  • 3 cups tomatoes, roughly chopped, with their juice*, OR 2 (15 ounce) cans tomato sauce, stewed tomatoes, or diced tomatoes (in any combination)
  • ½ tablespoon fresh oregano, finely chopped, OR ½ teaspoon dried oregano
  • ½ teaspoon salt
  • ¼ teaspoon pepper (or to taste)
  • 1 pound cooked chicken, diced or shredded**
  • Hot cooked rice or 1 pound cooked pasta (such as penne or farfalle)

DIRECTIONS

  1. Heat oil in a large skillet; add garlic and sauté one minute. 
  2. Add onion and peppers and sauté until vegetables are tender.
  3. Stir in the tomatoes and seasonings; bring to a boil. Reduce heat; simmer, uncovered, for 10 minutes.
  4. Add cooked chicken; stir to combine and heat through.
  5. Serve over rice or pasta.

TIPS

*To easily chop tomatoes, reserving their juice, first remove stem and core.  Then add them whole to a large liquid measuring cup; use kitchen shears held straight up and down to roughly chop them. Bonus: the amount needed can be seen right on the measuring cup as you chop!
**Simmer chicken breasts on the stove in a pot of water for a couple hours (until tender). Use a fork or fingers to shred/break into pieces the chicken, separating from fat as you go (no need to trim chicken before cooking). Refrigerate or freeze prepared chicken until ready to use (thawing first, if necessary).

ALLERGY INFO

This recipe is free of dairy, eggs, peanuts, tree nuts, soy, fish, and shellfish. It can be made wheat-free by using rice or gluten-free pasta.  Always double-check ingredients, including cross-contamination risk based on your level of sensitivity and comfort.

Sunday, June 3, 2012

Welcome!

Welcome to my new site!  Like my former one, this sites features yummy recipes that just happen to be allergy-friendly--free of the top 8 common allergens or modifiable to meet YOUR dietary needs.  Please follow me today!  There are several giveaways coming up soon and you don't want to miss out!!  Thanks for visiting here!